Interrogation Poster Design

Assignment 2: Proposal Pack, Final Major Project Developement

Interrogation_Poster_v3.jpg

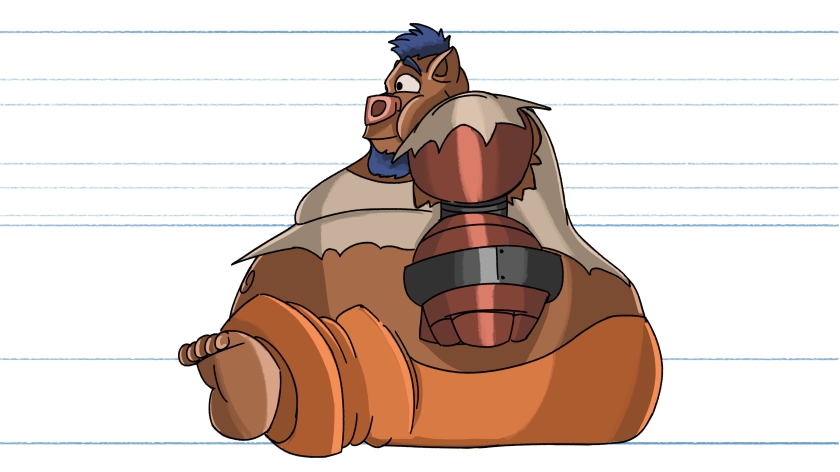
Above is a poster I designed to promote my FMP animation, here I simply used a rough sketch idea from my sketchbook and then expanded on the idea further to help make it look more appealing. I had to do various edits including scale and composition of the shot in order to get that professional look. Since I was struggling to start with I looked on Google.com and found lots of animated movie posters, this helped me develop a idea of what I could include in my poster and how the layout would be setup.

I decided to have Carlos and the cookie in the poster because it shows the main purpose to the story and gives that sense of mystery in terms of why this character has a spotlight on a cookie. I really like how this design turned out because it is not too complex and not too simple either, giving that balance of information the audience need to identify what the animation is about or at least get a hint to what it’s about. This will intrigue the audience to look further into this animation and hopefully this poster will influence the audience to watch my final animated sequence.

Interrogation: Character Turnarounds

Assignment 2: Proposal Pack, Final Major Project Developement

Below are my character turnarounds for Carlos and Detective Taylor, here I have explored a series of different angles for both characters, providing a 3D turnaround reference for when I start to animate my characters. I chose to do these turnarounds in Photoshop because I wanted to make sure that I kept a consistent height for all angles, as well as similar dimensions for the different angles. By having a accurate design on both characters and all angles I will be able to look at my reference images clearly and animate the character with the same dimensions from all angles. This will also help me to keep my designs consistent because this reference has a clear indication to the proportions of the character from all angles, and in my animation I can have these turnarounds up as reference and revert back to them if I am struggling with a pose or specific angle.

Furthermore these to help develop these character turnarounds I followed a character turnaround for animation tutorial from Draw With Jazza to help me keep a consistent size and design.

Carlos Turnaround

Carlos_Character_Turnaround_v5

Front

Carlos_Character_Turnaround_Front

Side

Carlos_Character_Turnaround_Side

Back

Carlos_Character_Turnaround_Back

3/4 Front

Carlos_Character_Turnaround_3-4_Front

3/4 Back

Carlos_Character_Turnaround_3-4_Back

Detective Taylor Turnaround

Detective_Taylor_Character_Turnaround_v5

Front

Detective_Taylor_Character_Turnaround_Front

Side

Detective_Taylor_Character_Turnaround_Side

Back

Detective_Taylor_Character_Turnaround_Back

3/4 Front

Detective_Taylor_Character_Turnaround_3-4_Front

3/4 Back

Detective_Taylor_Character_Turnaround_3-4_Back

By having each of these angles I will confidently be able to animate my character much better because I have essentially a 3D model/ turnaround of my character so I can use these angles as a guide and then apply them to the relevant pose or action in the animation. By looking at other turnarounds and following the tutorial I mentioned earlier I thought it was best to try and keep these designs as simple as possible, this is because I will be drawing these characters multiple times and I need to make sure the animation flows nicely with a consistent design. Therefore having these simple cell shaded designs seemed like the best approach for my animation, as in previous experience having a complicated design makes it much harder to animate, whereas a simple design will be quicker and more effective at telling the story.

Background Setup in Toon Boom Harmony

Assignment 2: Proposal Pack, Final Major Project Developement

Below are some screenshots that show my process for creating my 3D background in Toon Boom Harmony. Basically I started off by taking all the Photoshop background files and edited them to make sure each layer was in a folder. Then in Harmony I used File> Import> Images this allowed me to import my Photoshop backgrounds.

Interrogation_room_BG_Screenshots_1

Then once I had the files in Toon Boom I grouped each of the different layers for each panel in separate groups. To do this I clicked one of the layers for one of the files (e.g Side Wall) then I clicked the peg button and created a peg for that layer. Then I dragged any other files related to that file into the peg, allowing me to have a group for each wall panel.

Interrogation_room_BG_Screenshots_2

Now I was able to move all the files together for that panel at once rather than having to move each one individually. However in order to move, scale or rotate in the perspective view I had to do the following:

Interrogation_room_BG_Screenshots_3

Double click the peg and a small menu will pop up like in the image below. To allow you images to move in 3D space you have to tick the enable 3D box and then under the rotation section you need to click Euler Angles. This will allow you to rotate your images, so in my case I could rotate the floor panel from a front facing panel to a flat image on the bottom plane.

Interrogation_room_BG_Screenshots_3b

I repeated this process for each of the backgrounds I imported into Toon Boom, allowing me to create the different images you see below.

Interrogation_room_BG_Screenshots_4Interrogation_room_BG_Screenshots_5Interrogation_room_BG_Screenshots_6Interrogation_room_BG_Screenshots_7Interrogation_room_BG_Screenshots_8Interrogation_room_BG_Screenshots_9Interrogation_room_BG_Screenshots_10

After putting together my backgrounds I wanted to add some depth to some of my backgrounds as when the camera looks front on at one of the images it may look a little flat. Therefore I simply went into the top view tab and moved some of the layers around e.g door panels and pillar layers, this allowed me to move them in front or behind the main drawing just to bring that 3D perspective/ view to the design.

I am really happy with how this background turned out because it creates a stage setup for me so I can add a camera where the missing panel is and then I can animate the characters over the top of the shot. I know in my designs I have chairs and a table but I found that I may have to make these features as separate drawings when I animate because if I do what I did with my backgrounds the table will look really flat. However I can either draw them in or I can make them in Maya and import the Maya file in. But I need to research further into how I will apply those features.

Interrogation Room Backgrounds

Assignment 2: Proposal Pack, Final Major Project Developement

Below are my individual background paintings for the Interrogation room, here I have taken a different approach to my usual way of adding background to my animation. Using the research from Toon Boom I found that instead of drawing each background for each shot, I thought it would be a lot more efficient to create the 4 walls, ceiling and floor panels for my Interrogation room, then in Toon Boom Harmony import them as Photoshop files and move each image into place to create a 3D model of the interrogation room, similar to the one in my research.

Furthermore I have made sure that some of the backgrounds have multiple layers so that I can animate some of the features. For instance on the door background I have created different layers for the 2 door panels, this will allow me to animate a open and close animation for when Detective Taylor exists and enters the room. Plus I have added some different layers to make the flat images more 3D, as in Toon Boom I can use the perspective and top view to make some of the layers come forward slightly to make the 3D effect, allowing my backgrounds to not feel flat.

With each of these backgrounds I decided to stick with the grey scale value because I thought that the grey scale niche would create that classic detective feel and also adding some mystery to the animation. Plus I think the grey scale backgrounds work because they help bring the metallic feel/ texture to the scene. However to make that metallic wall design I used a image from Google.com of a rusty metal panel and then I added it over the top of my painted background. Changing the opacity I was able to make the texture form on top of my design without losing any of the detail I painted so it looks like the texture is implemented into the design.

Back Wall

Interrogation_room_Back_Wall_v3

Ceiling panel

Interrogation_room_Ceiling_v3

Door panels

Interrogation_room_Door_v3

Floor panel

Interrogation_room_floor_v2

Side Wall

Interrogation_room_Side_Wall_v1

Non reflective window Wall

Interrogation_room_Window_Wall_v3

Now I will need to go into Toon Boom Harmony and test out these backgrounds to see it they work as a 3D background.

Creating a 3D background with 2D background illustrations Research

Assignment 2: Proposal Pack, Final Major Project Developement

Below I took some time into researching how to create a background in Toon Boom Harmony without having to draw a background for each individual shot of my animation. Because I am pressed for time in terms of producing my animation, I want a background that I can be used for my entire animation and I just have to animate over the top, as I want to focus on making the animation the best it can be. Therefore using the link below I went onto Toon Boom’s website and found a simple step by step tutorial for making a 3D background with 2D image planes.

https://docs.toonboom.com/help/harmony-14/premium/3d-space/position-layer-3d-space.htmlhttps://www.google.com/search?

Below is a link to the google images page that I found researching into this idea and I found that programmes like South Park use a similar method to get the room backgrounds for their characters.

q=toon+boom+harmony+room+background&source=lnms&tbm=isch&sa=X&ved=0ahUKEwjVucnoh7ngAhU1tHEKHfJlDggQ_AUIDigB&biw=1920&bih=1009#imgrc=_

Anyway below are a few screenshots that show my interpretation of following the step by step instructions. This process seems quite basic to setup as all you need to do is import your Photoshop file and then double click on the layer and tick enable 3D and click Euler angles to help make the plane rotate, scale and move in 3D space. Therefore to test it out I created a basic room using a Photoshop file which I duplicated twice to make the other panels and then I used the Euler angles menu to rotate the planes at 90 or -90 degrees and then I used the move tool to move them next to each other to build a basic set/ stage for an environment. Seeing how simple this is I am going to use the same technique for my backgrounds because it will allow me to quickly construct a background and then work on the animation.

I was going to make my background in Maya but the issue was that the modelling process was taking too long and I would not be able to animate the door open and close without having to render out the animation in Maya first and then import it frame by frame. This seemed way to long to do so I thought that working straight in Toon Boom would be more effective since I am animating in Toon Boom Harmony anyway.

Interrogation_room_Plan_Screenshot_1Interrogation_room_Plan_Screenshot_2Interrogation_room_Plan_Screenshot_3

Interrogation Colour Scripts

Assignment 2: Proposal Pack, Final Major Project Developement

Below are my colour scripts for my Interrogation animation where I have used Lou Romano as inspiration to help develop my use of colour and techniques. Using Lou Romano’s Colour scripts as a guide I decided to paint my colour scripts with a simple block colour with my custom Photoshop paint brush and a gouache brush. However unlike Lou Romano I decided to add a little more detail with some basic cell shading just to help develop those lighting details.

For these colour scripts I took my beatboard frames and then painted over the top using my custom Photoshop brushes. However I wanted to explore different colours instead of focusing on grey scale values. Although I struggle with painting and applying colour I thought that I should give it a go. As you can see in the colour scripts below, I kept the same colour palette for the two characters, but I decided to change the colour of the background using blues, green and red to help indicate different emotions. Using some research I found some different emotions for the colours I used, therefore I chose Blue for the first shot to bring that calm and tranquil feeling as the two characters are calmly sipping tea before Detective Taylor interrogates Carlos.

The Green colour was used to show the fear of rejection from Detective Taylor because she is confident she will get him to confess but there is a slight hesitation that she may fail. The red is to indicate the anger from Detective Taylor when she stands up and storms out of the room. I thought having these coloured backgrounds would help develop a better sense of the feelings/ emotions occurring in the animation.

I have only colour scripted half of my beatboards because I was unsure if I want a colour or grey scale animation. I came across the idea in some feedback I could create a classic detective niche with a grey scale animation but I will need to explore this further before I make a decision.

If I decide to use colour in my animation I think these colour palettes would work the best for these characters, because they stand out from the background and props, plus they each have their own identity with the colour palettes so the audience can easily identify them.

Interrogation_Colour_Script_Sc_1_Shot_1aInterrogation_Colour_Script_Sc_1_Shot_1bInterrogation_Colour_Script_Sc_1_Shot_1cInterrogation_Colour_Script_Sc_1_Shot_1dInterrogation_Colour_Script_Sc_1_Shot_1eInterrogation_Colour_Script_Sc_1_Shot_2aInterrogation_Colour_Script_Sc_1_Shot_2bInterrogation_Colour_Script_Sc_1_Shot_2cInterrogation_Colour_Script_Sc_1_Shot_3aInterrogation_Colour_Script_Sc_1_Shot_3bInterrogation_Colour_Script_Sc_1_Shot_3cInterrogation_Colour_Script_Sc_1_Shot_4aInterrogation_Colour_Script_Sc_1_Shot_4bInterrogation_Colour_Script_Sc_1_Shot_4cInterrogation_Colour_Script_Sc_1_Shot_5aInterrogation_Colour_Script_Sc_1_Shot_5bInterrogation_Colour_Script_Sc_1_Shot_5cInterrogation_Colour_Script_Sc_1_Shot_5dInterrogation_Colour_Script_Sc_1_Shot_5eInterrogation_Colour_Script_Sc_1_Shot_5fInterrogation_Colour_Script_Sc_1_Shot_5gInterrogation_Colour_Script_Sc_1_Shot_5hInterrogation_Colour_Script_Sc_1_Shot_5iInterrogation_Colour_Script_Sc_1_Shot_5jInterrogation_Colour_Script_Sc_1_Shot_5kInterrogation_Colour_Script_Sc_1_Shot_6aInterrogation_Colour_Script_Sc_1_Shot_6bInterrogation_Colour_Script_Sc_1_Shot_6cInterrogation_Colour_Script_Sc_1_Shot_6dInterrogation_Colour_Script_Sc_1_Shot_6eInterrogation_Colour_Script_Sc_1_Shot_7aInterrogation_Colour_Script_Sc_1_Shot_7bInterrogation_Colour_Script_Sc_1_Shot_7cInterrogation_Colour_Script_Sc_1_Shot_7dInterrogation_Colour_Script_Sc_1_Shot_7eInterrogation_Colour_Script_Sc_1_Shot_7fInterrogation_Colour_Script_Sc_1_Shot_7gInterrogation_Colour_Script_Sc_1_Shot_7hInterrogation_Colour_Script_Sc_1_Shot_8aInterrogation_Colour_Script_Sc_1_Shot_8bInterrogation_Colour_Script_Sc_1_Shot_8cInterrogation_Colour_Script_Sc_1_Shot_8dInterrogation_Colour_Script_Sc_1_Shot_8eInterrogation_Colour_Script_Sc_1_Shot_8fInterrogation_Colour_Script_Sc_1_Shot_8gInterrogation_Colour_Script_Sc_1_Shot_8hInterrogation_Colour_Script_Sc_1_Shot_8i

Lou Romano Colour script research

Assignment 2: Proposal Pack, Final Major Project Developement

Below are a series of images that I researched online after getting some feedback from my tutor. Struggling with colour I thought that I should try using simple block colours instead of detailed paintings for my colour scripts. Therefore thinking of this style I was recommended Lou Romano, a colour script artist who has worked on Pixar’s Incredibles and Pixar’s UP. Looking at these images below I can see that this simple block style works really well as the colours used show different emotions and make the audience feel different ways when seeing the different scenarios. Therefore I am going to use this artist as reference to inspire my own colour scripts so that I can help figure out if I should use colour for my animation or stick with the grey-scale values.

http://louromano.blogspot.com/

7829e1381ef6ec77a7b28ff14c56f161da3f0408d7e645dcbd5a1bcc1bcbee73Lou Romano, colorscript, "The Incredibles," 2004. Digital painting.

Lesson Tutorials: Audio Pipeline- Lip Sync

Assignment 2: Proposal Pack, Final Major Project Developement

Below is a quick test of using “Drawing Substitution” in Toon Boom Harmony for Lip syncing. Plus in this tutorial lesson I learned how to use Dope sheets to a audio track so that I could see when dialogue occurs on specific frames.

http://www.11secondclub.com/competitions/february19

Above is the link to the audio track I used from the 11 second club to practise this process. Below are 2 dope sheets that I made while listening to the audio, so that I could separate when each character speaks at different frames in the animation. This will allow me to determine which frames need the drawing substitutions when I animate this audio in Toon Boom Harmony.

Dope Sheet _ X Sheet_Audio_Character_1

Dope Sheet _ X Sheet_Audio_Character_2

Dope sheets are used to organise the number of frames are required for different parts of a audio track and allows the animator to key frame each lip sync with the dope sheet as reference. This will really help me with my own animation because I am thinking of adding some lip sync animation to my own Final Major Project animation. Drawing substitution is a useful tool in Toon Boom Harmony which allows you to draw different mouth shapes on each frame, then Harmony saves these shapes as numbered drawings which you can apply to different frames of your scene using the X sheet and adding the number of the mouth shape to a frame.

Therefore below is a quick test of using drawing substitution to the audio track, allowing me to see how I need to go through the full audio to animation process.

Interrogation Room Maya Model Background

Assignment 2: Proposal Pack, Final Major Project Developement

Below are some screenshots that show different angles of my Maya model for my Interrogation room. I started making this Maya model because from some feedback it was easier to create a 3D environment in Maya which I could then render as different shots and then import the rendered videos as images/ frames in Harmony. However halfway through making this model, I realised that this would not work very well because I would have to animate the doors opening and closing and if the timing is off I may have to re render and it would just take to long.

However these screenshots below show my attempt at building a 3D environment in Maya for my Interrogation room. This model will help a lot with creating the backgrounds in Photoshop, as I can use this as a guide for drawing the perspective. I could even render a frame of each angle and then draw over the top of the image to get a 3D looking perspective for my 2D backgrounds. I was hoping to use a 3D background because it would have been interesting to integrate 2D and 3D animation.

Interrogation_room_3D_Model_test_screenshot_1Interrogation_room_3D_Model_test_screenshot_2Interrogation_room_3D_Model_test_screenshot_3Interrogation_room_3D_Model_test_screenshot_4Interrogation_room_3D_Model_test_screenshot_5Interrogation_room_3D_Model_test_screenshot_6Interrogation_Room_Background_Model_v4

Above is a quick render view of the 3D model, this shows another issue I could of had if I stuck with using a 3D model, as to import a Maya model into Harmony you need to export the Maya file as a harmony model which I could not do because I did not have the option. Plus I would of had to make sure the lighting is better than this, otherwise the scene will be dark.

But now I know I am going to make a 2D background in Photoshop or Harmony I will use this model as a guide to help develop and refine a 3D looking environment with perspective.

Sketchbook Feedback

Assignment 2: Proposal Pack, Final Major Project Developement

FMPD Portfolio Feedback

Initial Ideas:

Your initial ideas are really well explored and there is plenty of variety in genres to justify this many idea.

Could you have used a more experimental approach, maybe using different mediums to tell stories and have clear exploration of different genres.

For example, ‘Mage Duel’ explores the use of effects such as fire and ice but it would have been interesting to see how far you could of pushed these ideas (how far you could of pushed the boat out).

Interrogation

The character designs are really well explored, there is plenty of initial concepts and ideas. It would have been great to see the use of different mediums such as watercolour, acrylic paint etc. as your concept work could have been more experimental.

Detective: Where did you get the inspiration from for this character? Is she based off of someone you know or a certain actress? What are the reasons behind your design decisions regarding this character?

Carlos: Could you create even more work involving this character interacting with your environment? Show us how this character fits into the world he is from, show us concepts of the battles he has been in, the crimes he has committed etc. this will further solidify the personality and design choices you have made for Carlos.


Research and Animation:

Is there any reference material you have used to inspire your portfolio work? You mentioned Treasure Planet, it would be great to see the specific props or characters that inspired your own work.

Are there similar stories out there that are similar to yours? What does your story have in common and why does it have this in common? What is different about your FMP compared to other stories told about the same situation?

Could you research the ‘interrogation’ storyline more? Are there specific shots or tropes that are commonly found in ‘interrogation’-type stories? Explore the reasons behind your design ideas no matter how weird or ‘out there’ there are, this is what will make your story unique and personal to you.


I will use this feedback to help develop and refine some of the work in my sketchbook.